
Here's What You'll Take Away From Reading This
- How to choose the right recording method based on the equipment you already own, from a phone to a full audio interface rig.
- Where to place your microphone for a grand piano and an upright piano, and why each position produces a different sound.
- A step-by-step process for recording piano audio to your computer using free software like Audacity and GarageBand.
- How to record a digital pianoor MIDI keyboard and make it sound as realistic as possible.
- The most common recording mistakes that ruin otherwise great performances, and exactly how to avoid every one of them.
Recording a piano seems like it should be simple. You sit down, you play, someone presses record. The result, more often than not, is a thin, roomy, slightly muffled file that sounds nothing like the piano in the room.
That happens because the piano is acoustically one of the most complex instruments to capture well. Sound radiates from multiple parts of the instrument at once. The room itself becomes part of the recording the moment you press record. And most beginner advice assumes you have gear you probably do not own.
Getting a genuinely good piano recording does not require a studio or thousands of dollars in equipment. It requires understanding a few core principles and applying the right technique for your specific setup. You will find exactly that here, covering grand pianos, uprights, and digital keyboards at every gear level from smartphone to professional microphone rig.
Which Recording Path Is Right For You?
Before anything else, match your recording approach to the gear you actually have. Jumping straight to advanced microphone techniques when you are working with a smartphone leads to unnecessary frustration.
Use the paths below to identify your setup, then head directly to the section that covers it in detail.
Path 1, Phone Or Tablet Only
Best for pianistswho want to capture a practice take, a quick demo, or a social media clip without buying any additional equipment. All you need is your phone or tablet, a quiet room, and a free recording app.
Path 2, USB Microphone Into A Computer
Best for pianists who want noticeably better audio quality without dealing with audio interfaces or XLR cables. You need a USB condenser microphone (solid options include the Blue Yeti, Audio-Technica AT2020USB+, and Rode NT-USB), a laptop or desktop computer, and free recording software.
Path 3, XLR Microphone, Audio Interface, And DAW
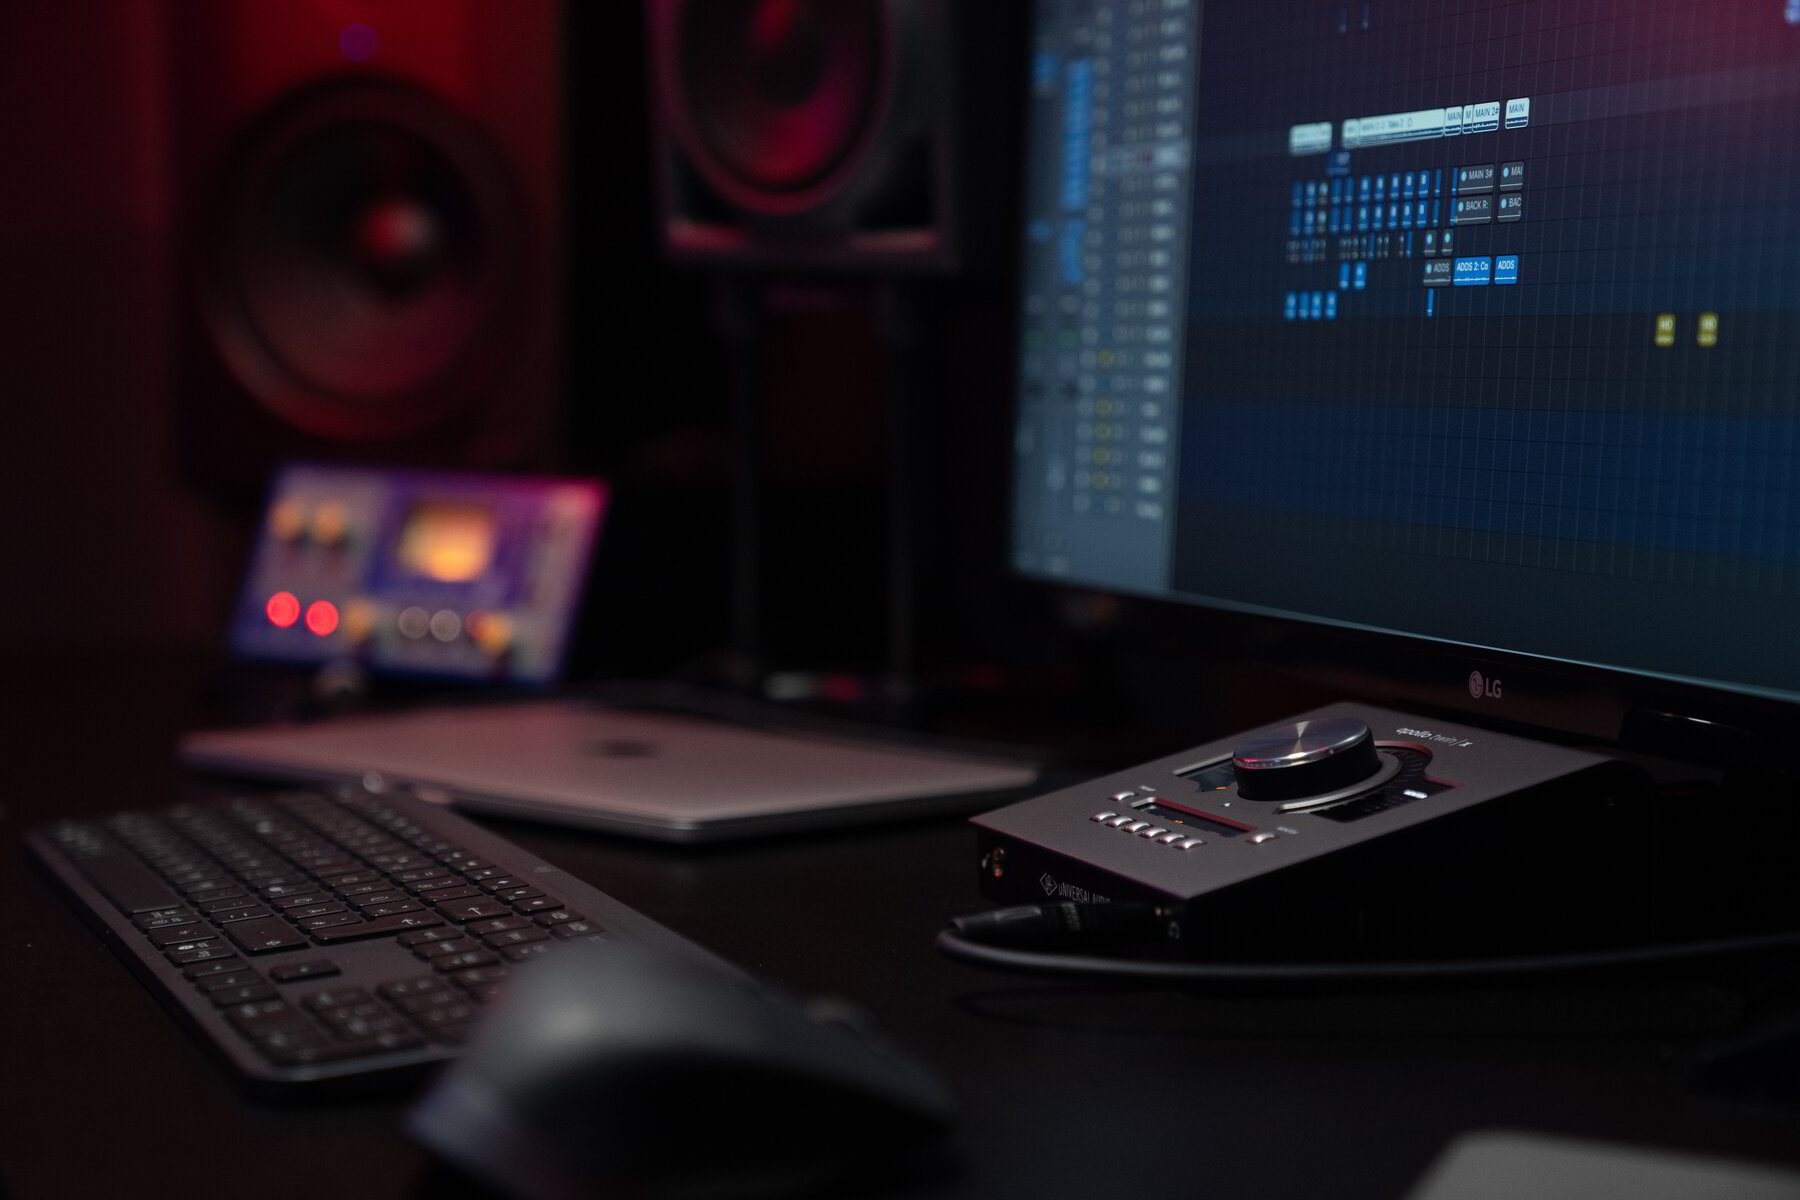
Best for musicians who want professional-quality results and are ready to invest in a proper recording chain. You need one or two condenser or ribbon microphones with XLR outputs, an audio interface such as the Focusrite Scarlett 2i2 or Universal Audio Volt 2, and a DAW.
Path 4, Digital Piano Or MIDI Keyboard
Best for pianists who do not have an acoustic instrument but want to record keyboard parts for a project. You need a digital piano with a USB or line output, a computer with a DAW, and a virtual piano plugin.
Why Piano Is One Of The Hardest Instruments To Record
Understanding the core challenges makes every technique in this article click into place. This section is worth reading before anything else.
The Full Frequency Range Problem
A full-size piano spans more than seven octaves. It produces an enormous range of frequencies simultaneously, from the deep bass of the lowest notes to the high-frequency shimmer of the upper registers and their overtones.
A microphone with a limited frequency response cuts off parts of that range before they even reach the recording. This is the main reason condenser microphones outperform dynamic microphones for piano. Their wider, more sensitive frequency response captures the instrument more completely.
Sound Comes From Multiple Directions At Once
Inside a piano, strings are struck by hammers and resonate across the entire iron frame. Sound radiates from the strings, the soundboard, the open lid, and even from the bottom of the instrument. On an upright piano, a significant portion of sound exits through the back panel.
A single microphone in one fixed position always captures certain frequencies more than others. Placement is not just about how far you are from the piano. It is about where the sound you want is actually coming from.
The Room Becomes Part Of The Recording
The same piano in a carpeted living room with soft furniture sounds noticeably different from that same piano in a bare room with hard floors and exposed brick. Hard, reflective surfaces create acoustic reflections that arrive at the microphone slightly after the direct sound, adding an unflattering reverb quality.
Imagine a pianist recording in a rented space with concrete floors and nothing on the walls. Even with a professional microphone and careful placement, the recording sounds hollow and echoey. In that situation, the room is the problem, not the gear.
Choosing The Right Microphone For Recording Piano
Your microphone is the single most important variable in piano recording quality. Here is how each type performs and which situation it suits best.
Condenser Microphones
Condenser microphones are the standard recommendation for piano recording. They are highly sensitive across a wide frequency range, capturing both the warm body of the bass strings and the detailed shimmer of the upper registers.
Large-diaphragm condenser microphones such as the Audio-Technica AT4040, Rode NT1, and AKG C414 are well-suited for close-miking inside a grand piano or for single-microphone setups. Small-diaphragm condensers such as the Rode M5 or Shure SM81 are often preferred for stereo pairs placed outside the instrument, where they offer a more precise and natural stereo image.
One important note: condenser microphones require phantom power, typically 48V supplied by an audio interface or mixing board. Check that your interface provides this before purchasing a condenser mic.
Ribbon Microphones
Ribbon microphones capture a smooth, warm sound with a natural roll-off of the highest frequencies. Some recording engineers prefer them for classical or jazz piano, where a softer, more vintage character is the goal.
That said, ribbon mics are fragile, expensive, and require a strong, clean preamp to perform well. For most home setups, a condenser is the more practical and durable starting point.
Dynamic Microphones
Dynamic microphones are more durable and affordable, but they are less sensitive and have a narrower frequency response than condensers. For piano, they tend to miss the subtler overtones that define the instrument's character.
However, dynamic mics are not useless here. Some producers deliberately use them for a compressed, lo-fi piano tone that suits certain pop or indie tracks. If a dynamic mic is all you have, it is worth experimenting before assuming the result will be unusable.
USB Vs. XLR
A USB microphone plugs directly into your computer with no additional equipment. It is the simplest path for beginners. The trade-offs are less flexibility, generally no option to use two microphones simultaneously, and a more limited upgrade path.
An XLR microphone connects to an audio interface, which connects to your computer. This setup gives you control over gain, lets you use two microphones at once, and allows you to upgrade individual components over time without replacing the whole chain.
Do You Really Need Two Microphones?
Two microphones allow you to record in stereo, giving the piano width and a more natural presentation. The left hand and right hand physically occupy different parts of the keyboard, and a stereo recording reflects that spatial reality.
A single well-placed microphone still produces an excellent result. Do not delay recording because you only have one microphone. Get the best sound with what you have, then expand your setup when the time is right.
How To Record A Grand Piano
The grand piano offers more microphone placement flexibility than any other type, and that flexibility is both its biggest advantage and its biggest challenge.
Setting Up The Room And Checking The Piano First
Before placing a single microphone, walk around the room and listen carefully while someone else plays the piano. Pay attention to where the sound feels most full and balanced. That position is often where the microphone will produce the best result.
Also, check tuning before anything else. A recording made on an out-of-tune piano cannot be fixed cleanly in post-production, and any instruments added later will clash against an inconsistent pitch reference.
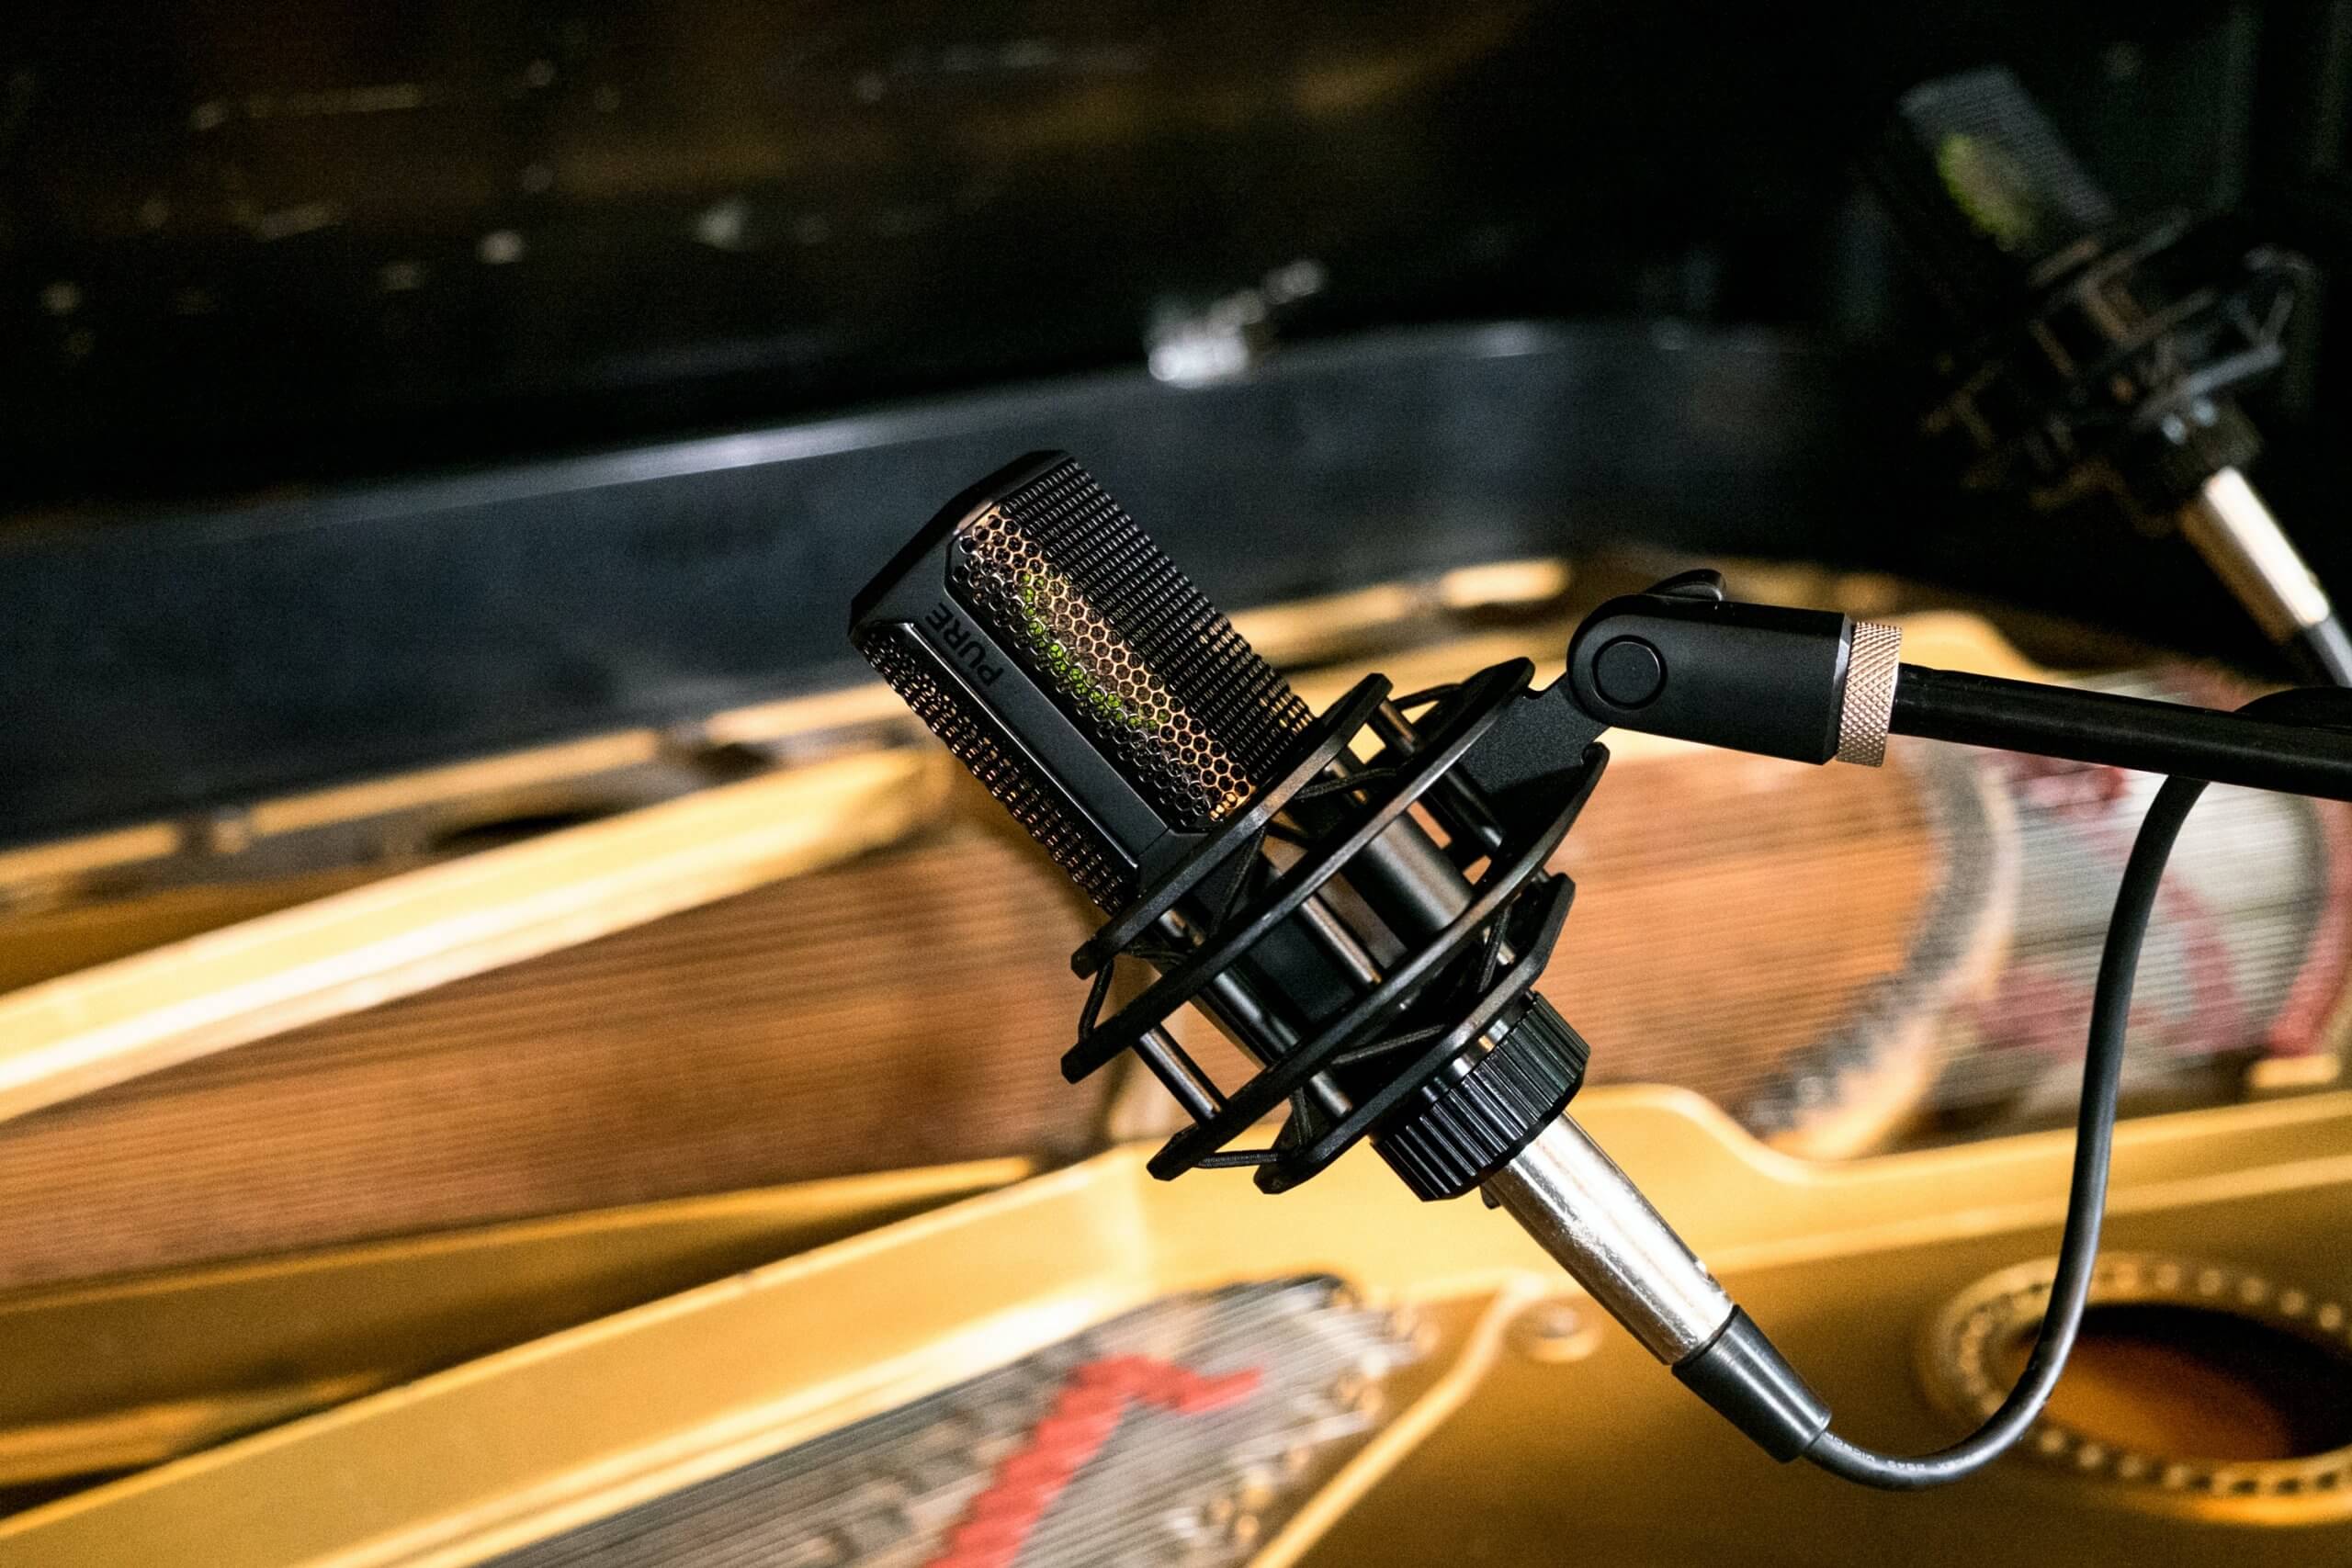
Close-Miking For A Bright Pop Sound
Close-miking inside the open lid is a popular choice for pop, rock, and contemporary recordings. It produces a detailed, direct sound with a strong hammer attack and clear separation between the treble and bass registers.
Follow these steps to close-mike a grand piano.
- Raise the lid to its full open position and secure it on the prop stick.
- Position two large-diaphragm condenser microphones approximately 11 inches above the strings, pointing straight down.
- Place one microphone over the lower bass strings and one over the higher treble strings.
- Apply the 3:1 rule and keep the two microphones at least three times farther apart from each other than each one is from the strings. This prevents phase cancellation.
- Lower the lid partially if you need more isolation from room noise.
Ambient Miking For A Natural Classical Sound
Placing microphones outside the piano captures the instrument blending with the room. The result is more balanced, less percussive, and much closer to how a live piano sounds to a listener seated in the same space.
Follow these steps to record a grand piano with ambient miking.
- Position two small-diaphragm condenser microphones in an X/Y stereo configuration, with the capsules as close together as possible at roughly a 90-degree angle.
- Place the stereo pair approximately 3 feet in front of the piano at about keyboard height, or slightly above.
- Walk the room while someone plays and adjust the position until the sound feels full and balanced.
- Record a short test take and listen back through headphones to check for unwanted room reflections.
Single-Microphone Setup For Grand Piano
A single large-diaphragm condenser positioned just outside the open lid, angled toward the strings, is a reliable and simple option that produces a strong mono recording.
Mono piano recordings can be widened slightly in a mix using reverb or subtle stereo plugins. They also sit cleanly in productions where the piano does not need to dominate the full stereo field.
The 3:1 Rule And Why Phase Cancellation Matters
Phase cancellation happens when two microphones pick up the same sound at slightly different times. Sound travels in waves, and if two microphones are at different distances from the same source, they capture those waves at different points in the cycle. When played back, certain frequencies cancel each other out, and the audio sounds thin or hollow.
The 3:1 rule is the simplest prevention. If each microphone is 4 inches from the piano strings, the two microphones must be at least 12 inches apart from each other. The further each mic is from the sound source, the further apart they need to be from one another.
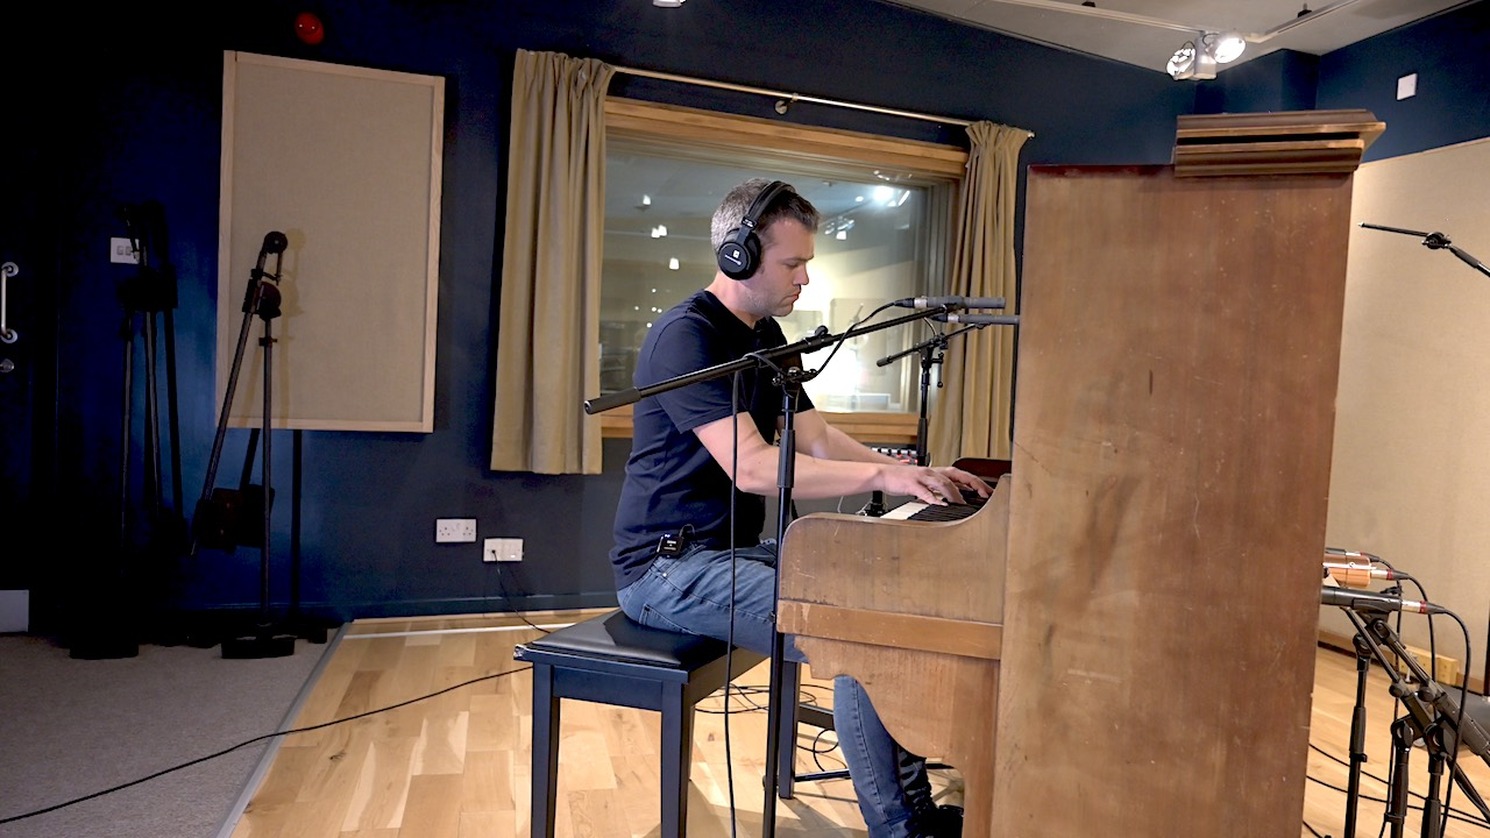
How To Record An Upright Piano
Upright pianos are more common in home settings, and they are fully capable of producing excellent recordings with the right preparation and technique.
Preparing The Upright And Removing The Panels
Before placing any microphones, remove as many panels as the piano allows. On most uprights, this means opening the lid on top, removing the front panel above the keyboard, pulling out the keyboard lid, and removing the lower panel beneath the keys.
Removing these panels allows the harp (the iron frame and strings inside) to resonate more freely, producing a fuller and more open sound. Think of it as the upright equivalent of raising the wing of a grand piano.
Checking For Mechanical Noise Before You Press Record
Upright pianos produce a variety of unwanted sounds that microphones pick up clearly. Squeaky sustain pedals, clicking key mechanisms, and rattling internal hardware are all common culprits.
Press each pedal slowly and listen for squeaks. Play across the full keyboard range at different dynamics and listen for rattles. A small amount of dry lubricant on a squeaky pedal hinge can save an entire recording session from frustration. Also, ask the performer to remove rings, bracelets, and any jewellery that could create noise against the keys during a take.
Microphone Above The Keyboard, Brighter And More Percussive
Placing a stereo pair of condenser microphones above the keyboard and angling them toward the hammers produces a bright, detailed sound with a noticeable hammer attack. This positioning suits certain pop, ragtime, or retro-style recordings. If you want a warmer and more balanced result, the below-keyboard position is the better starting point for most material.
Microphone Below The Keyboard
Placing microphones below the keyboard, near the lower panel opening where the harp is exposed, captures a noticeably warmer and more even tone. Hammer noise is greatly reduced, and the full body of the piano comes through much more clearly.
Follow these steps to mike an upright piano below the keyboard.
- Remove all front panels as described above.
- Position a stereo pair of condenser microphones below the keyboard line, angled upward toward the harp.
- Start with the microphone capsules at the edge of the lower panel opening and adjust from there based on what you hear.
- Keep both microphones at the same distance from the harp to reduce phase issues.
- Record a short test take and compare it to an above-keyboard recording to decide which suits the material better.
The below-keyboard position is particularly effective for recording classical, jazz, or ballad-style piano, where the warmth and body of the instrument matter more than hammer attack and brightness.
How To Record Piano On Your Phone
A phone recording is not the same as a studio recording. But with the right technique, it is far better than most people expect, and it is entirely usable for demos, practice logs, and social media content.
Best Positioning For A Phone Recording
The single most impactful thing you can do is position the phone correctly. Most people hold it too close or prop it at an angle that makes sense for video but not for audio.
Place your phone at keyboard height, approximately 2 to 3 feet from the piano. This distance gives the microphone room to capture the instrument's full sound without being overwhelmed by any one area of the keyboard. Avoid placing the phone directly on the piano surface, because the surface will transmit vibration and mechanical noise directly into the recording.
IPhone
Voice Memosis the quickest option for capturing a piano performance on an iPhone. Open the app, place the phone in position, and press record. The built-in microphones on recent iPhone models capture reasonable stereo audio that works well for practice recordings and quick demos.
GarageBandon iPhonegoes further. You can record into an audio track, adjust input levels, apply basic EQ, and export in higher quality formats. It is free and already installed on most iPhones.
For noticeably better results, a compact clip-on microphone that connects to the Lightning or USB-C port, such as the Rode VideoMicro II or DJI Mic 2, produces significantly cleaner audio than the built-in mic.
Android
On Android, the built-in Voice Recorder app handles basic recordings on most devices. RecForge II and Hi-Q MP3 Voice Recorderare free apps that let you adjust the recording format, sample rate, and bit depth for more control over the output quality.
As with iPhone, an external USB-C microphone compatible with your device will significantly improve the recording beyond what the built-in microphone can deliver.
Simple Tips To Improve Phone Recording Quality
Turn the phone to airplane mode before pressing record. Incoming notifications create interference noise in the audio.
Record in the smallest, softest-furnished room available. A carpeted bedroom with a bed and curtains is acoustically much better than a tile-floored kitchen or bare hallway.
Do a 10-second test recording first and listen back through headphones before committing to a full take. Problems that are invisible in the moment often become obvious on playback.
Avoid recording near an open window, a running appliance, or an air conditioning vent.
Related: How I Make Passive Income With My Piano Skills
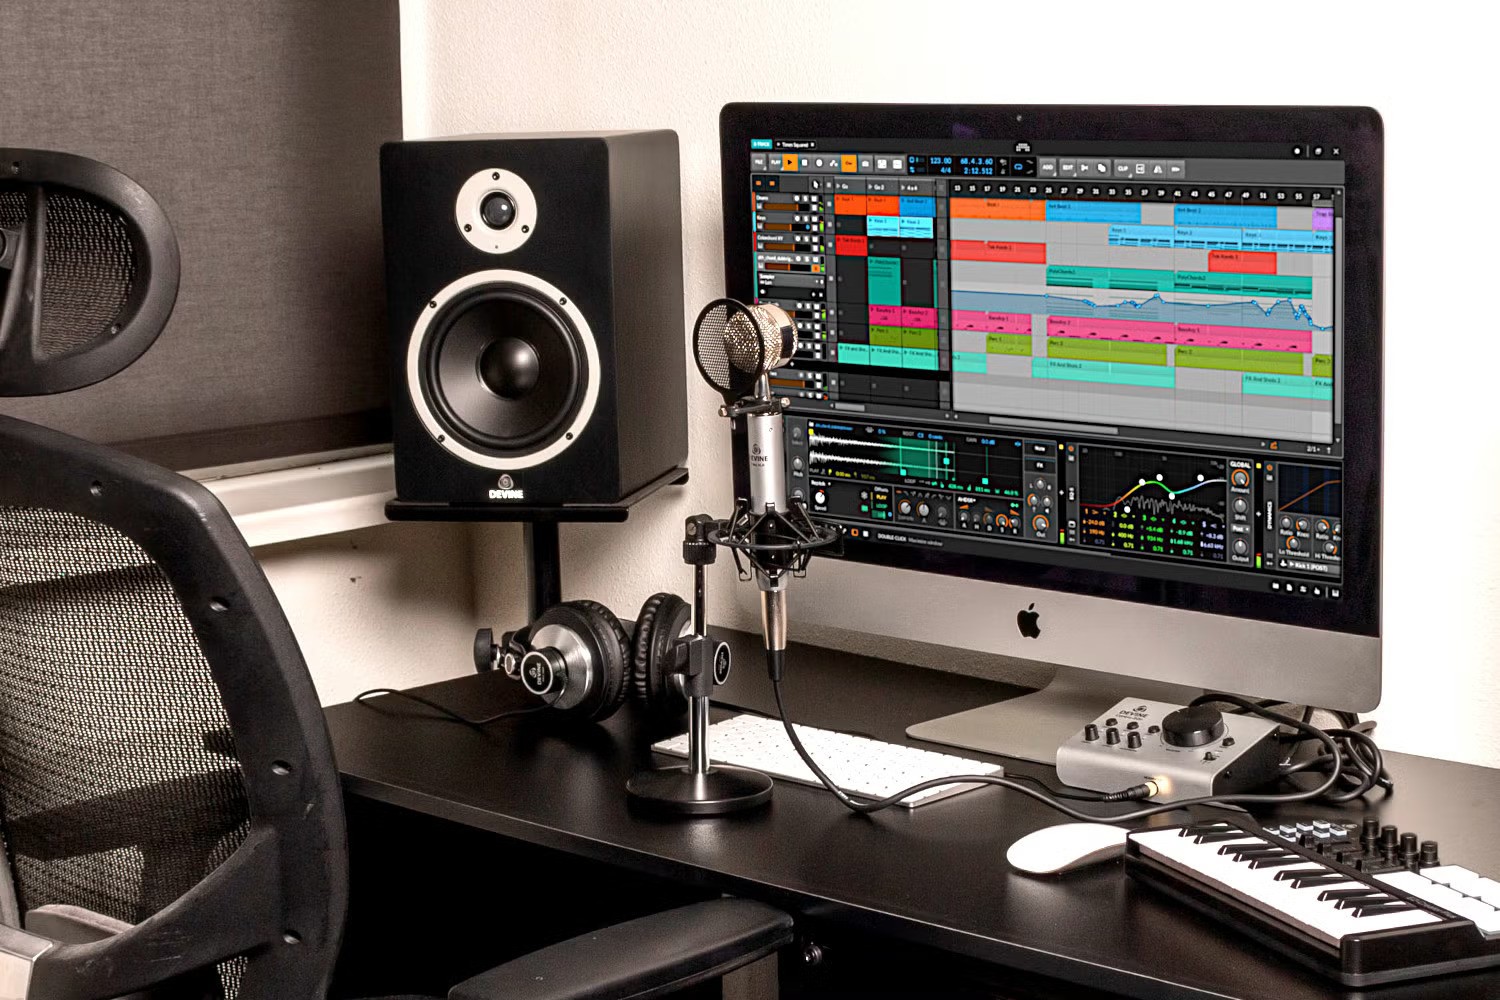
How To Record Piano Audio To Your Computer
Recording to a computer gives you far more control over the final result than a phone recording can offer, and the setup is simpler than most beginners expect.
What You Need
For an XLR microphone setup, the chain has three parts. A microphone, an audio interface that connects to your computer via USB, and recording software to capture and edit the audio.
If you are using a USB microphone, you skip the audio interface entirely. The microphone plugs directly into your computer's USB port and is recognized immediately by most recording software.
Setting Up An Audio Interface For Piano Recording
Follow these steps to configure your audio interface before recording.
- Connect your audio interface to your computer via USB and allow it to install. Most modern interfaces, such as the Focusrite Scarlett 2i2 and PreSonus AudioBox USB 96, are plug-and-play on both Mac and Windows.
- Connect your XLR microphone to input 1 on the front of the interface, or to inputs 1 and 2 for a stereo pair.
- Enable phantom power by pressing the 48V button if you are using a condenser microphone.
- Open your DAW and navigate to the audio settings. Set the input device to your audio interface.
- Create a new mono or stereo audio track and arm it for recording.
- Set the input channel to match where the microphone is plugged in on the interface.
- Play the piano at full performance volume and watch the input meter. Aim for peaks around -12 dBFS to leave enough headroom without risking clipping.
How To Record Piano In Audacity
Audacity is free, open-source, and available for Windows, Mac, and Linux. It is one of the most accessible tools for recording piano at home and handles everything from basic capture to editing and export.
Follow these steps to record a piano in Audacity.
- Download and install Audacity for free from audacityteam.org.
- Connect your microphone directly via USB, or connect an XLR microphone to your audio interface.
- Open Audacity and go to Edit, then Preferences, then Devices. Set the recording device to your microphone or audio interface.
- In the main toolbar, click the microphone input dropdown and select your device.
- Create a new stereo audio track by going to Tracks, then Add New, then Stereo Track.
- Click the red record button and begin playing the piano.
- When finished, press Stop.
- Use the selection tool to trim any silence or noise from the beginning and end of the recording.
- Go to File, then Export, then choose WAV for the highest quality uncompressed file, or MP3 for a smaller format suitable for sharing.
GarageBand As A Free Alternative On Mac And IOS
GarageBand comes pre-installed on all Mac computers and is free on the App Store for iPhone and iPad. On Mac, it provides a clean multi-track recording environment with built-in plugins and a straightforward interface. If you are also capturing a performance video alongside the audio, pairing your DAW workflow with video editing software for beginnerscan make it much easier to sync the final take for YouTube, lessons, or social media clips.
To record piano into GarageBand on Mac, open a new project, create an audio track, set your input device to your microphone or interface in the Smart Controls section at the bottom of the screen, and press the red record button. The built-in EQ and compression available in Smart Controls can improve the recorded piano sound without requiring any third-party plugins.
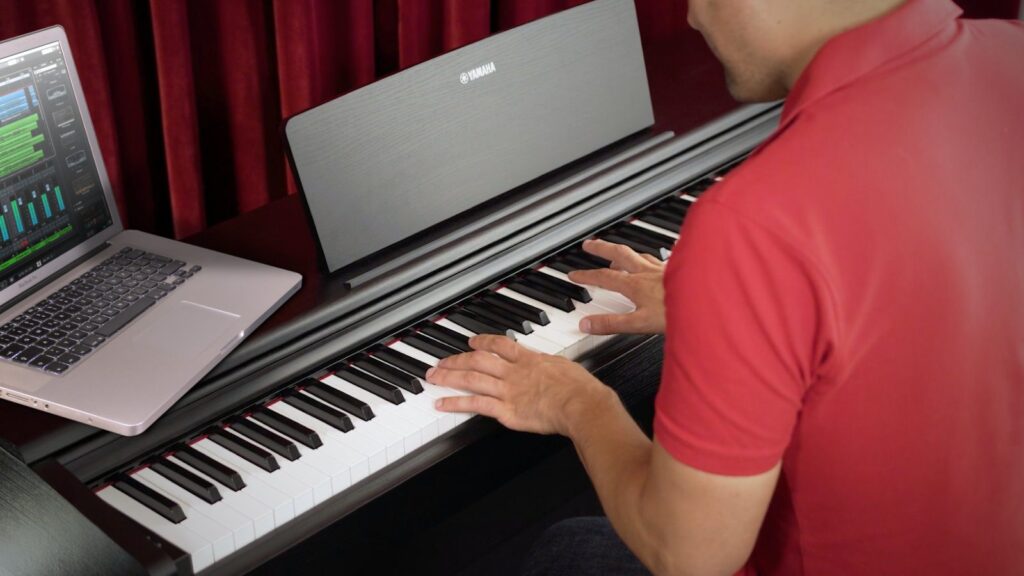
How To Record A Digital Piano Or MIDI Keyboard
Not everyone has access to an acoustic piano, and a digital instrument opens up recording options that acoustic pianos cannot match, particularly for removing room noise entirely from the equation.
Direct Line Recording
Most digital pianos have a headphone output or a dedicated stereo line output. Running a cable from that output directly into an audio interface bypasses microphones entirely and captures the keyboard's internal sound engine as a clean digital signal.
This method produces a completely noise-free recording and is ideal for composers and producers working on digital productions where room acoustics are not an advantage.
Recording Piano Via MIDI And Virtual Instruments
MIDI recording captures the performance data rather than the sound itself. That data includes which notes were played, how hard (velocity), how long, and when the sustain pedal was pressed. A virtual piano plugin inside your DAW then uses high-resolution samples of real acoustic pianos to generate the actual sound output.
Follow these steps to record piano via MIDI.
- Connect your MIDI keyboard to your computer via USB.
- Open your DAW and create a new MIDI or instrument track.
- Load a virtual piano plugin. Free options include the Spitfire LABS Felt Piano and Piano One by Sound Magic. More detailed paid options include Keyscape and Native Instruments The Giant.
- Set the MIDI track input to your keyboard.
- Press record and play your performance.
- After recording, open the piano roll to view and edit the individual notes, velocities, and sustain pedal information.
How To Make A MIDI Piano Recording Sound Realistic
The most common mistake with MIDI piano is making it too mechanically perfect. Real piano performances contain subtle timing variations, dynamic differences between individual notes, and small imperfections that make them feel played rather than programmed.
Some advanced virtual instrument ecosystems and practice platforms even refine playback response using behavioral datagathered from repeated performances, which is one reason digital piano tools can feel more expressive than they once did.
To improve MIDI piano realism, keep these adjustments in mind.
Do not quantize every note to the grid. Slight timing variations are what separate a mechanical-sounding MIDI track from something that feels alive.
Use a physical sustain pedal when recording. Most MIDI keyboardsaccept a sustain pedal via a 1/4-inch port, and the difference in feel and realism is significant.
Enable pedal noise, hammer noise, and damper noise within your virtual piano plugin if those settings are available. These mechanical sounds are present in every real acoustic piano and contribute meaningfully to the sense of authenticity.
Reduce the overall velocity input slightly. Many virtual piano plugins respond more naturally to mid-range velocities and can sound harsh and brittle when played at maximum velocity throughout.
How To Record A Keyboard On PC
On Windows, recording a MIDI keyboard follows the same steps above in a DAW like Reaper. Available for a $60 USD personal license, Reaper is one of the most capable and affordable DAW options for PC users who want more than Audacity can offer.
For USB MIDI keyboards, Windows typically recognizes the device automatically. If it does not, installing the manufacturer's ASIO driver will reduce latency and improve real-time monitoring performance.
Room Acoustics And Environment
Strong microphone placement and quality equipment will not save a recording made in a bad-sounding room. Acoustics are one of the most significant variables in piano recording quality, and they are largely within your control, even with no budget.
Choosing The Right Room At Home
The best room for recording piano at home is typically a medium-sized space with soft surfaces. A carpeted bedroom with curtains, a sofa nearby, and bookshelves filled with books is acoustically far better than a kitchen with tile floors and bare walls.
Hard, parallel surfaces directly opposite each other create a fluttery, echoey quality in recordings that is difficult to remove in post-production. If you can choose your recording room, choose the softest one in the building.
Simple DIY Acoustic Treatment With What You Own
Professional acoustic foam panels are not required to improve a home recording space meaningfully. Moving a thick rug into the recording room, pulling curtains fully across the windows, and placing a few couch cushions or pillows on nearby surfaces can reduce unwanted reflections significantly.
A pianist working in a spare room might drape a heavy duvet over a clothing rack positioned to one side of the piano. A few minutes of improvised treatment like that often removes the worst acoustic problems from a space before a single note is played.
The Silent Saboteur Of Piano Recordings
The noise floor is the constant background sound present in any recording environment. This includes the hum of a refrigerator, the buzz of a computer fan, traffic from outside, and the quiet hiss of an HVAC system. In everyday life, the brain filters these sounds out automatically. A microphone does not.
Before pressing record, sit silently in the room for 30 seconds and listen carefully. Identify every controllable noise source and eliminate it. Turn off fans, move the computer to another room if possible, and close windows and doors.
Recording At The Right Time Of Day
For home recordings, the time of day affects the noise floor more than most people expect. Early morning, before traffic builds, or late evening after the neighborhood settles down, produces a noticeably lower ambient noise floor than mid-afternoon.
If you are recording in an apartment building, be aware of plumbing noise, elevator sounds, and activity from neighboring units. These factors are simply easier to avoid at certain times of day.
Common Recording Mistakes And How To Avoid Them
Even with solid equipment and careful placement technique, a handful of specific mistakes trip up most beginners. Knowing what they are before you press record saves hours of frustration.
Placing The Mic Too Close To The Hammers
Positioning a microphone very close to the hammers inside a grand piano gives a sharp, percussive result. Some producers deliberately want this sound. But most beginners end up there by accident, and the result sounds more mechanical than musical.
Start further away from the hammers and move the microphone closer incrementally. Record a short test, take it each time, and stop at the position that sounds right for the material.
Recording Without Checking Levels First
Recording at a level that is too high causes clipping, which is digital distortion that cannot be repaired in post-production. Most recording software shows a red indicator on the meter when clipping occurs.
Always do a 15-second test recording at full performance volume before committing to a complete take. If the meter is hitting the top of the scale or flashing red, turn the gain down on your audio interface until peaks sit comfortably around -12 dBFS.
Ignoring The Sustain Pedal Squeak
A squeaky sustain pedal is surprisingly common and surprisingly destructive to a recording. Close-placed microphones pick up every squeak with clarity, and removing this sound in post-production is essentially impossible without damaging the piano audio around it.
Check the pedal before every single session. A few drops of dry lubricant applied to the pedal hinge resolve most squeaks in seconds.
Page Turning On A Live Microphone
When sheet musicis used during recording, any page turn will be picked up clearly by the microphone. The sound of paper moving is louder in a recording environment than it appears during practice.
The solutions are straightforward. Memorize the piece, use loose single pages spread across a wide music stand, or record in sections that avoid page turns near the microphone position.
Not Recording In Sections When You Should
Insisting on a perfect full-length take of a long and technically demanding piece is one of the most common reasons recording sessions drag on for hours without a finished product.
Recording in sections is not cheating. It is standard studio practice at every level of professionalism. If the pianist sustains the final note or chord of each section slightly into the beginning of the next, the edit points become much easier to trim and crossfade cleanly in the DAW.
Basic Editing And Mixing For Piano
The recording is done. These next steps transform a raw audio file into something finished and polished.
Setting Levels And Trimming Silence
Open your recording in your DAW or in Audacity. Trim any silence, room noise, or count-in from the beginning and end of the file. If the overall recording is too quiet, use the Amplify or Normalize function under the Effects menu in Audacity to bring the level up without distorting the signal.
When And How To Use EQ On A Piano Track
Equalization lets you adjust the balance of frequencies in the recording. A useful starting point is a gentle high-pass filter set at around 80 Hz to remove low-frequency rumble from HVAC systems, street vibration, or microphone handling that falls below the piano's actual playing range.
Be conservative with EQ on the piano. Heavy-handed frequency adjustments tend to make the instrument sound unnatural very quickly. Small corrections of 1 to 3 dB are usually all that is needed.
Adding Reverb
If you recorded in a naturally good-sounding room, you may not need to add any reverb at all. If the recording sounds too dry, a small amount of a quality reverb plugin, such as Valhalla Room (affordable and widely trusted) or the built-in reverb in GarageBand, can add space without sounding artificial.
A very common mistake is adding too much reverb. A piano that sounds beautifully spacious when heard solo often becomes muddy and indistinct when other instruments are added around it in a full mix.
Exporting Your Piano Recording In The Right Format
For the highest quality archived file, export as WAV at 24-bit depth and a sample rate of 44.1 kHz or 48 kHz. For sharing, uploading to streaming platforms, or sending to other musicians, export as a high-quality MP3 at 320 kbps.
Keep both the original project file and the exported audio file. If you need to re-edit the recording at any point, the project file saves you from starting over completely.
Frequently Asked Question
Can I Record Keyboard On PC With USB?
Yes, if the keyboard supports USB audio or USB MIDI. USB audio sends sound directly. USB MIDI sends note data that needs software instruments or notation software to produce sound or score output.
How Do I Record Piano On IPhone?
Use Voice Memos for the simplest capture, or GarageBand if you want more control. Place the iPhone a few feet from the piano and test the position before recording a full take. GarageBand for iPhone also supports external microphones.
How Do I Record Piano With One Microphone?
Place one microphone where the piano sounds balanced to your ear, usually not too close to the hammers. On an upright piano, start above the strings or toward the soundboard. On the grand piano, start above the strings and adjust for tone.
Can I Record Piano With Just A Phone?
Yes. It works well for practice review, lessons, and casual sharing. The main limitations are less depth, less stereo realism, and more sensitivity to room noise than a dedicated microphone setup.
Do I Need To Tune An Acoustic Piano Before Recording?
Ideally, yes. Recording quality cannot hide an out-of-tune instrument, and tuning usually improves the final result more than a small gear upgrade.
What Software Is Easiest For Beginners To Record Piano?
Audacity is one of the easiest options for basic audio recording on a computer, and GarageBand is very approachable on Apple devices. Both are well documented in their official guides.
Final Thoughts
Recording piano well is not about having the most expensive gear. It is about understanding a few fundamental principles and applying the right technique for your specific instrument and setup.
If you have an acoustic piano, start with placement before gear shopping. If you have a digital piano, check the manual before you assume you need microphones. If all you have today is a phone, make the quietest setup you can and record anyway. A clean, useful recording made now will teach you more than a perfect setup postponed for months.
You Might Also Like: The Effects Of Piano Lessons On The Brain For Children And Adults