
Quick Answer: Recording Shows Pianists What The Listener Hears
Pianistsshould record their performances because playback separates playing from listening. While you play, your attention is divided between notes, rhythm, fingering, balance, expression, pedal, memory, and what comes next.
A short recording lets you hear the result from the listener’s side, where timing, tone, pedal blur, tension, and musical shape are easier to notice.
The goal is not to collect perfect takes. The goal is to turn a vague feeling into useful feedback: record, notice, diagnose, adjust, and re-record.
Practice note:The most useful recordings are rarely the most polished ones. A rough 20-second clip that reveals one clear problem can be more valuable than a full take you feel too overwhelmed to review.
Key Takeaways: What Recording Does For Your Piano Playing
- Recording helps pianists hear timing, tone, dynamics, and phrasing problems they often miss while playing.
- Video reveals posture, hand movement, tension, and pedal habits that audio alone cannot show.
- Playback creates a feedback loop: notice one issue, fix it, and re-record to test improvement.
- Saved recordings make progress visible, which can improve motivation and confidence.
- Recording full takes helps pianists prepare for recitals, auditions, online performances, and pressure situations.
- The best recording habit is not “record everything.” It is “record with a question.”
Who This Recording Habit Helps Most
This habit is especially useful if you are:
- A beginner who wants to hear progress more clearly.
- An intermediate pianist polishing rhythm, tone, balance, or pedal.
- A self-taught player without regular teacher feedback.
- A student preparing for a recital, exam, audition, jury, or online performance.
- An adult learner who wants practice to feel more focused and measurable.
You do not need to be advanced before recording helps. In fact, recording is often most useful while a piece is still messy, because that is when the feedback can shape your practice early. If you are still building the basics, this habit fits naturally into a broader learning pianoroutine.
Which Recording Routine Should You Use?
Different pianists need different recording habits. Use the routine that matches your current situation instead of recording everything the same way.
| Reader Situation | Best Recording Routine |
| Beginner learning notes | Record 10–20 seconds of one small passage. This keeps feedback simple and avoids overwhelm. |
| Adult learner with limited time | Use one 5-minute record-review-replay loop. This gives useful feedback without taking over practice. |
| Self-taught pianist | Record one section weekly and keep short notes. This replaces some of the feedback you miss without regular lessons. |
| Intermediate pianist polishing a piece | Record one phrase or section with a specific target. This helps refine balance, voicing, pedal, rhythm, or phrasing. |
| Recital student | Record one full take each week, then fix short sections. This tests continuity without replacing focused practice. |
| Online performer | Record video early to check sound, framing, lighting, and endings. This prepares the full listener experience, not just the notes. |
| Audition, exam, or jury student | Practice one-take recordings without stopping. This builds recovery, pacing, focus, and performance readiness. |
Why Recording Works: You Hear Differently When You Are Not Playing
Recording works because it separates two jobs that usually happen at the same time: performing and evaluating. When you are playing, your attention is inside the task. When you listen back, you can step outside the task and hear the performance more like a teacher, examiner, audience member, or future version of yourself.
While playing piano, you are handling rhythm, notes, coordination, touch, balance, phrasing, memory, and pedal at the same time. Even a simple piece can fill your working attention. Because of that, your brain naturally filters.
You may notice the obvious wrong note but miss the left hand rushing. You may feel the phrase rising but not realize the melody disappears under a heavy accompaniment.
Playback gives you a more honest listening position because your hands are no longer busy. You can listen for one thing at a time instead of trying to play and evaluate everything at once.
Useful listening targets include:
- Is the tempo steady?
- Is the melody clear?
- Are the hands balanced?
- Does the pedal blur the harmony?
- Do phrases breathe naturally?
- Do mistakes interrupt the musical flow?
Research on music students suggests that audio and video playback can support self-assessment. One small Springer study of piano studentsfound that video feedback improved overall self-assessment accuracy, while audio feedback was slightly more useful for judging purely auditory details. Because the study was small, treat it as useful support rather than proof that one format is always better.
Piano playing is physical, so “it felt good” and “it sounded good” are not always the same. A passage can feel smooth because your fingers know the pattern, but the sound may still be uneven. Another passage can feel shaky because it is hard, yet the recording may show that the listener would barely notice.
Recording helps align intention, feeling, and sound. Once those three match more closely, practice becomes more purposeful.
The Three Ways Recording Helps A Pianist
Most people say recording yourself is useful because it helps you hear mistakes. That is true, but it is only part of the value.
A regular recording habit helps pianists in three important ways:
- It helps you notice what you missed while playing.You hear timing, balance, articulation, pedal, and phrasing details more clearly after the performance.
- It prepares you for performance pressure.Pressing record creates a mild sense of pressure, which helps you practice focus, recovery, and continuity.
- It shows progress clearly over time.Old recordings give you proof that your rhythm, voicing, tone, and confidence are improving.
For many pianists, recording is one of the simplest ways to make practice more honest, focused, and measurable.
What To Record: Short Clips, Sections, Or Full Takes
Not every recording needs the same purpose. A 20-second clip of a difficult measure and a full recital-style take are both useful, but they reveal different things.
Think of practice recording as a microscope and performance recording as a mirror. One zooms in. The other shows the whole picture.
A practice recordingshould be short, specific, and easy to repeat. You are not trying to capture a polished performance. You are trying to answer one question, such as:
- Is my left hand rushing in measure 12?
- Does the melody project over the accompaniment?
- Is the staccato crisp enough?
- Am I lifting the pedal before the harmony changes?
- Does the phrase lose energy before the cadence?
A performance recording asks a different question: “Can I play the piece from beginning to end and communicate the music?” Full takes reveal where concentration drops, how you recover after mistakes, whether transitions are secure, and whether the musical shape holds across the whole piece.
If you are preparing for a recorded exam, audition, competition, jury, or online performance, practice full takes without stopping. A one-take recording is not just a test of note accuracy. It tests how well you begin, keep the musical line moving, recover from slips, and finish without resetting every time something feels imperfect.
Use the length of the recording to match the problem.
| Recording Length | Best Use |
| 10–30 seconds | Fixing one passage, rhythm, voicing, or pedal issue |
| One page or section | Testing continuity across phrases |
| Full piece | Preparing for performance pressure |
| Multiple full takes over time | Tracking readiness and confidence |
What To Record At Each Stage Of Learning A Piece
Use this table when you are not sure whether to record a short clip, a section, or a full take.
| Stage Of The Piece | What To Record - What To Listen For |
| First learning | 10–20 seconds - Notes, fingering, and basic rhythm |
| Hands together | One phrase - Coordination, pulse, and hesitation points |
| Musical shaping | One section - Balance, tone, dynamics, and phrasing |
| Nearly ready | Full piece - Continuity, memory, pacing, and recovery |
| Performance prep | One-take run-through - Pressure, presentation, and whether the piece holds together |
A common mistake is recording the whole piece too early and then feeling buried under problems. Start small when diagnosing. Go full-length when testing readiness.
What Pianists Notice When They Listen Back
This section gives you a practical listening map. Instead of asking, “Was that good?” ask, “What exactly did the recording show me?”
A recording becomes useful when you listen with a target. Without a target, playback can turn into vague self-criticism. With a target, it becomes a practice tool.
Timing, Tempo, And Rushing
Timing problems are often easier to hear on playback than while playing. Many pianists unconsciously rush familiar sections and slow down before difficult ones.
Listen for:
- A tempo that speeds up during easier patterns.
- Hesitation before leaps, ornaments, or memory spots.
- Uneven rhythm between the hands.
- A final line that drags because concentration fades.
Recording with a metronome can be useful, but do not use it only to check obedience. Use it to find where your internal pulse becomes unstable.
Wrong Notes, Hesitations, And Memory Gaps
Wrong notes matter, but they are not always the most important thing. A single missed note that passes smoothly may be less disruptive than a repeated hesitation before every hard bar.
When listening back, separate three categories:
- Wrong note:The pitch is incorrect.
- Hesitation:The musical flow breaks.
- Memory gap:The structure is not secure enough yet.
This distinction helps you choose the right fix. Wrong notes may need slow practice. Hesitations may need rhythm grouping. Memory gaps may need harmonic analysis or hands-separate recall.
Tone Quality, Balance, And Voicing
Pianists hear tone differently at the keyboard than listeners hear it across the room or through a recording. The accompaniment may sound softer to you than it really is. The melody may feel expressive but disappear in playback.
Listen for balance first:
- Can the melody be heard easily?
- Is the left hand too heavy?
- Are inner voices intentional or accidental?
- Does the tone become harsh in louder passages?
A useful exercise is to record the same phrase three times with different melody levels. The recording will often reveal how much more shaping is needed than you thought.
Dynamics, Phrasing, And Musical Shape
Dynamics are not just volume changes. They show direction, tension, release, and character.
On playback, ask:
- Does the phrase go somewhere?
- Is the climax clear?
- Do repeated phrases sound identical or intentionally varied?
- Are soft sections still alive?
- Are loud sections controlled rather than forced?
Phrasing often improves when you stop judging individual notes and listen for musical sentences.
Pedaling, Resonance, And Blurriness
Pedal can feel wonderful under the foot and still sound muddy in playback. This is especially true on acoustic pianos, in resonant rooms, or when playing Romantic repertoire.
Listen for:
- Harmony changes that smear together.
- Bass notes that overpower the texture.
- Pedal releases that come too late.
- Dry sections that need more connection.
- Repeated pedal habits that ignore the music.
Video can also help here because you can see whether your foot moves with the harmony or by habit.
Recovery After Mistakes
A performance is not defined only by whether mistakes happen. It is also defined by how you recover.
When listening to a full take, notice:
- Did the mistake interrupt the pulse?
- Did you repeat the bar unnecessarily?
- Did your tone become tense afterward?
- Did you recover musically?
Professional-sounding playing is not mistake-free playing. It is playing that maintains direction even when something goes wrong.
Quick rule:if a listener would notice the pause more than the wrong note, recovery should become the practice target.
Audio Vs Video: What Each One Reveals
Audio and video are not rivals. They are different lenses.
Use audio when the question is about sound: rhythm, tone, balance, dynamics, phrasing, pedal clarity, and the overall musical result. Use video when the question is about movement: posture, hand shape, wrist freedom, shoulder tension, pedal habits, and performance presence.
| Use Case | Best Choice |
| Checking rhythm, tone, balance, and phrasing | Audio |
| Checking posture, tension, hands, and pedal use | Video |
| Preparing for recital pressure | Video or full-take audio |
| Sharing with a teacher | Video if technique matters; audio if sound matters |
| Tracking progress privately | Either |
Video matters because piano technique is not only about fingers. Posture, shoulders, wrists, arms, breath, and pedal habits all shape the final performance. Research on pianist movementshows that physical motion can play a functional role in sound production and can also communicate musical structure and expression to listeners.
When reviewing video, look for function, not appearance:
- Do your shoulders rise in difficult passages?
- Does your torso collapse in quiet sections?
- Are you sitting at a height that allows free wrist movement?
- Does your body stiffen before leaps?
- Are your finger joints collapsing?
- Does your wrist lock during fast passages?
- Are your fingers flying far above the keys?
- Does your pedal foot move with the harmony or by habit?
If you are preparing to share a performance, video also shows the listener’s visual experience. Notice how you begin before the first note, whether you rush the ending, whether your body language becomes tense after a mistake, and whether the performance feels settled.
Camera-angle tip:for most self-review, a side-front angle is more useful than a straight overhead shot because it can show the keyboard, wrists, shoulders, bench distance, and sometimes the pedal. Use overhead video only when the main question is fingering, hand position, or note accuracy.
Why Every Pianist Should Make A Music Video
A music video does not have to mean a polished public upload. For a pianist, it can simply mean a complete video recording of a piece, with the sound, camera angle, body movement, beginning, ending, and performance presence all captured together.
This kind of video helps because it shows the full listener experience. Audio may reveal whether the melody is clear, but video also shows whether your posture tightens, whether your hands look tense, whether your pedal foot moves by habit, and whether the performance feels settled from the first note to the final release.
Making a private music video is especially useful before online performances, auditions, exams, recitals, or remote lessons. It lets you check not only how the piece sounds, but how the whole performance comes across. Even if you never share it, the process teaches you to perform with more awareness, continuity, and confidence.
Video Styles And Templates
When crafting a piano musicvideo, your visual style should reflect your sound. Each aesthetic has its strengths and choosing the right one helps your music connect more effectively with your intended audience.
Let’s explore some of the most popular styles used by musicians today:
1. Digital
Digital templates often feature sleek transitions, waveform animations, and minimal overlays that respond dynamically to your music. These are perfect for electronic pianists or performers who combine acoustic playing with digital instruments.
- Best for:Synth-based piano tracks, lo-fi remixes, or electronic reinterpretations of classical works.
- Look and feel:Clean, modern, and slightly futuristic.
2. Neon
Neon visuals make heavy use of glowing typography, motion graphics, and bright, pulsing colors. This style is ideal if your piano performance has a pop, EDM, or upbeat vibe.
- Best for:Energetic covers or original pop compositions.
- Look and feel:Youthful, vibrant, and performance-oriented.
3. Cyberpunk
Cyberpunk visuals bring together glitch effects, cityscapes, and digital noise textures. They pair beautifully with experimental, ambient, or techno-inspired piano tracks.
- Best for:Pianists experimenting with electronic textures or dystopian soundscapes.
- Look and feel:Dark, cinematic, and tech-infused.
4. Minimal
A minimal template strips away the clutter and keeps the focus squarely on the music and performer. It may include only subtle lighting changes, clean framing, or elegant typography.
- Best for:Solo performances, classical recordings, or emotional ballads.
- Look and feel:Elegant, timeless, and emotionally intimate.
5. Full Cinematic
This is the go-to choice for creating a short film around your music. Cinematic templates use lens flares, slow motion, color grading, and depth-of-field effects to create a film-like atmosphere.
- Best for:Original compositions, storytelling pieces, or competitions.
- Look and feel:Professional, immersive, and emotionally powerful.
These templates can all be found or customized using an online music video creator, an easy way to match visuals with your piano track, even if you don’t have editing experience.
The Record-Review-Replay Method
This is the core habit. Recording alone does not improve your playing. Reviewing and acting on the recordingdoes.
Use this loop whenever you want a recording to produce a clear next step.
Step 1: Record A Short, Specific Section
Choose a section small enough to fix. For many pianists, that means two to eight measures.
Before recording, name the target:
- “I am checking tempo stability.”
- “I am checking whether the melody sings.”
- “I am checking if the pedal blurs the harmony.”
- “I am checking the transition into the development section.”
A specific target keeps the review focused and prevents emotional overreaction.
Step 2: Listen Once For The Big Picture
The first listen should be broad. Do not stop after the first flaw.
Ask:
- Did the section communicate the intended character?
- Did the pulse feel stable?
- Did the main line come through?
- Did anything surprise me?
This first pass gives context. Sometimes the “big problem” you expected is not the biggest issue on the recording.
Step 3: Listen Again For One Target
The second listen should focus on one thing only. This is where many pianists go wrong: they try to fix rhythm, notes, tone, pedal, and expression all at once.
Choose one target:
- Rhythm.
- Balance.
- Pedal.
- Tone.
- Phrase direction.
- Recovery.
- Tension.
One target creates one practice action.
Step 4: Diagnose The Cause, Not Just The Mistake
A recording may show that something went wrong, but you still need to ask why.
For example:
- The tempo rushes because the left hand pattern is insecure.
- The melody disappears because the accompaniment is too heavy.
- The pedal blurs because the foot changes after the harmony.
- The phrase feels flat because every note has the same weight.
- The mistake repeats because the fingering changes every time.
Use this compact review formula:
- Name the issue.
- Find the location.
- Guess the cause.
- Choose one correction.
- Test that correction right away.
That is very different from sitting in judgment of yourself. The recording is not there to tell you who you are. It is there to tell you what happened.
Step 5: Practice The Fix And Re-record
After diagnosis, practice the correction slowly and deliberately. Then record again.
Do not wait for perfection. You are checking whether the change moved the passage in the right direction.
For example:
- Play the left hand alone with a steady pulse.
- Practice the melody louder than feels necessary.
- Change pedal exactly on harmonic shifts.
- Shape the phrase with exaggerated direction.
- Mark one reliable fingering and repeat it.
Then record the same section again and compare.
Step 6: Save The Best Take And Note What Changed
Keep a simple recording log. It does not need to be elaborate.
Write:
- Date.
- Piece and section.
- What you checked.
- What you noticed.
- What you changed.
- What improved.
This turns recordings into a progress archive instead of a pile of random files.
Expert’s Take:When reviewing a recording, do not start by asking, “Was it good?” Start by asking, “What is it telling me?” That one shift keeps the process useful instead of personal.
A 10-Minute Piano Recording Routine
A recording habit only works if it fits inside real life. This short routine gives you useful feedback without taking over the whole practice session.
- Warm up normally for a few minutes.
- Choose one short section, usually 10–30 seconds.
- Decide what you are listening for.
- Record one take.
- Listen back once.
- Write down one issue and one correction.
- Practice the correction a few times.
- Record again.
- Compare the two takes.
- Stop when you have better information, not when you feel perfect.
That last point matters. The goal is not to keep recording until you finally like yourself. The goal is to leave the session with clearer information than you had before.
Example: Turning One Recording Into A Real Fix
Beginner Example
A beginner records 20 seconds of a hands-together passage and notices a pause before every left-hand position change.
The problem is not “bad rhythm” in general; it is one repeated hesitation. The fix is to practice only the left-hand move, then record the same 20 seconds again.
Intermediate Example
An intermediate pianist records a lyrical section and notices the melody disappears every time the accompaniment enters.
Instead of replaying the whole piece, they record the same phrase with a deliberately lighter left hand. On the next playback, the melody is clearer, so the next target becomes shaping the crescendo.
Performance-Prep Example
A student preparing for an audition records a full take and discovers that the first page is secure, but concentration drops after the first mistake.
The next practice goal is not more note drilling; it is recovery practice: continue through slips, keep the pulse, and finish the phrase without restarting.
These examples show the recording habit working properly. One playback reveals a specific problem. The next take tests a specific change. Then the pianist chooses the next layer to improve.
What To Listen For By Repertoire Style
Different music asks for different listening priorities. Use the recording target that matches the piece you are practicing.
| Style Or Piece Type | What To Listen For First |
| Baroque or Bach | Even pulse, clean articulation, independence of voices, clarity without pedal blur |
| Classical sonatas or sonatinas | Steady tempo, phrase balance, clean transitions, controlled dynamics |
| Romantic repertoire | Melody over accompaniment, rubato control, pedal clarity, long phrase direction |
| Impressionist music | Color, resonance, pedal changes, balance between texture and melody |
| Pop, worship, or accompaniment | Groove, chord balance, timing with vocals, steady tempo, clear bass support |
| Exam, audition, or jury pieces | Continuity, memory security, recovery, polished beginning and ending |
Recording Builds Confidence Because It Makes Progress Visible
Many pianists quit or lose motivation because improvement is hard to feel day by day. Recording gives progress a memory.
You may not notice that your tone has become warmer over three months. But an old recording will. You may feel stuck on a piece, then hear that the tempo, phrasing, and confidence have quietly improved.
Old recordings can feel awkward, but they show what used to be difficult, how your sound has changed, which problems keep returning, which practice habits worked, and how your confidence develops over time. A progress archive is especially valuable for adult learners and self-taught pianists.
Recording also helps you get used to mild pressure. Pressing record can suddenly make a familiar passage feel less secure, which exposes what changes when you feel watched. Music performance anxietycan affect performance quality and wellbeing when it becomes excessive, so recording should be treated as a gentle preparation tool, not as a clinical treatment for anxiety.
Start gently:
- Record one phrase.
- Record one page.
- Record one full piece privately.
- Record for a teacher.
- Record for a trusted friend or online community.
A full take teaches something short clips cannot: how to continue. If you stop every time you make a mistake, you practice stopping. If you record full takes, you practice recovery.
How To Record Your Piano Playing Without Overthinking Equipment
You do not need a studio to begin. Most pianists should start with the simplest setup possible and upgrade only when the recording goal demands it. For a deeper setup guide, see how to record piano.
A useful recording is not always a beautiful recording. It is a recording that tells you what to practice next.
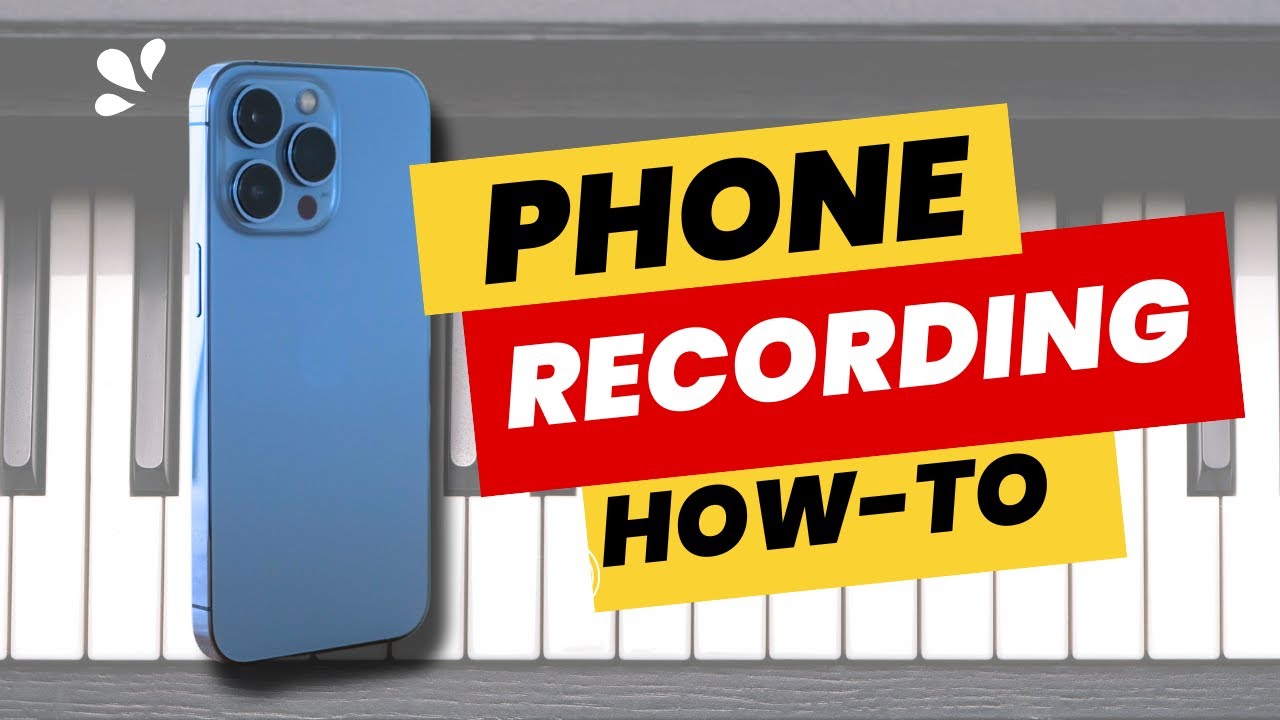
Start With Your Phone
A phone is enough for most self-review. It can capture rhythm, phrasing, balance, posture, and general tone clearly enough to guide practice.
Use these simple settings:
- Put the phone on a stable surface.
- Avoid placing it directly on the piano.
- Record in a quiet room.
- Check that the sound is not distorted.
- Name or organize recordings by piece and date.
Use this quick setup guide when you want a practical starting point without overthinking gear.
| Goal | Phone Position |
| Hear the overall sound | Place the phone a few feet away from the piano, not directly on it. |
| Check posture | Use a side-front angle that shows your upper body and keyboard. |
| Check pedal | Use an angle that includes your foot and the keyboard. |
| Check hands | Place the phone slightly above and to the side. |
| Share online | Use landscape orientation, a stable surface, and a clean background. |
Make one test recording before a serious take. Listen for distortion, room noise, and whether the melody is clear.
Easy Piano Recording Setup with Your Phone (Budget to Pro)
When A Digital Piano Or MIDI Recording Helps
Digital pianoscan make recording easier because many have built-in audio, USB, or MIDI options. If you are choosing a controller or home-practice setup, a guide to the best MIDI keyboardscan help you compare options.
Audio recording captures the sound. MIDI captures performance data such as notes, timing, and velocity, depending on the setup.
MIDI can help you inspect:
- Note accuracy.
- Rhythmic placement.
- Velocity patterns.
- Repeated timing issues.
- Practice consistency.
However, MIDI does not replace listening. A visually “correct” performance can still sound stiff, unbalanced, or unmusical.
When Better Microphones Are Worth Considering
Better microphones are worth considering when the recording will be shared publicly, submitted for an audition, sent to a competition, or used for serious portfolio work.
For everyday practice, better gear is optional. For self-assessment, clarity matters more than polish.
Upgrade only when your current setup prevents useful feedback. If you can hear rhythm, balance, pedal, and tone well enough to improve, your setup is already doing its job.
How To Review Recordings Without Becoming Too Self-Critical
Playback can be emotionally sharp. Many pianists hear only flaws at first.
The solution is not to avoid recording. The solution is to review recordings with rules that protect both your confidence and your progress.
Use One Goal Per Playback
Before pressing play, choose one goal.
Examples:
- “I am listening only for steady tempo.”
- “I am checking whether the melody is clear.”
- “I am watching my wrist in the repeated-note passage.”
- “I am checking whether the pedal changes cleanly.”
This prevents the common spiral where every detail becomes a problem at once.
Separate “Mistakes” From “Information”
A mistake is not a verdict. It is information about what needs attention.
Instead of saying, “I am bad at this piece,” translate the recording into practice language:
- “The left hand is not secure at the leap.”
- “The phrase loses direction after the high point.”
- “The pedal is late in the cadence.”
- “The tempo changes when the texture gets thicker.”
This makes the problem fixable.
Write Down Strengths As Well As Problems
Every review should include at least one strength. This is not false positivity. It is accurate assessment.
Write down:
- One thing that improved.
- One thing that sounded musical.
- One thing that felt more secure.
- One thing to fix next.
Balanced listening helps you stay motivated and prevents recording from becoming a punishment.
Stop Listening Before You Start Spiraling
Do not listen to the same flawed take ten times. After two or three focused listens, choose the next practice action.
A useful review ends with a plan:
- Slow down the passage.
- Change fingering.
- Practice hands separately.
- Mark pedal changes.
- Shape the phrase more clearly.
- Record again tomorrow.
When Not To Record
Recording is helpful only when it leads to better practice. It may be better to stop recording for the day if you are replaying takes emotionally, recording every attempt without changing anything, deleting everything out of frustration, or using playback only to judge yourself.
It is also possible to record too early in a practice session. If the notes, fingering, or rhythm are not even basically mapped out yet, slow practice may be more useful than another take. Record when you have a question the recording can actually answer.
Do Not Do This After Playback
- Do not restart the recording ten times without changing anything.
- Do not judge the whole performance from one mistake.
- Do not delete every rough take before you learn from it.
- Do not upgrade equipment before fixing the musical issue.
- Do not listen so long that practice turns into self-criticism.
The best playback session ends with one clear next action, not a longer list of reasons to feel discouraged.
When To Share Your Recordings
Not every recording needs an audience. Some recordings are private practice tools. Others are useful because they invite outside feedback.
The key is to share with intention. Ask yourself what kind of response would actually help.
Sharing With A Teacher
Teachers can use recordings to spot patterns that may not appear in one lesson. A teacher might notice that you rush every transition, tense your shoulder before leaps, or lose voicing when the pedal enters.
A recording is most useful when it comes with a clear question. Instead of saying, “What do you think?” ask:
- “Why does the left hand cover the melody here?”
- “Can you check whether my wrist stiffens before this leap?”
- “Is the pedal too heavy in this section?”
- “Does the tempo change before the difficult passage?”
Specific questions help a teacher give more precise feedback.
A good lesson question usually has three parts: the clip, the location, and the concern. For example: “In measures 17–24, can you check whether the left hand is too heavy when the melody enters?” That gives the teacher something specific to diagnose.
Sharing With Friends Or Online Communities
Online communities can offer encouragement, accountability, and fresh ears. This is especially useful for pianists who practice alone or enjoy digital pianospaces.
However, public feedback varies in quality. Share when you want general impressions, motivation, or performance practice. For technical diagnosis, a qualified teacher is usually more reliable.
Privacy And Permission Before Sharing
Before sharing a recording publicly, check whether anyone else appears or can be heard in the video. If a teacher, student, child, accompanist, duet partner, family member, or private home setting is included, get permission first.
This matters even if the recording feels casual. A practice recording that is useful for you does not automatically need to become public content. If you share original music online, it is also worth understanding the basic ways pianists can legally protect their online compositions.
Preparing For Online Piano Performances
If you plan to share a performance online, recording early helps you prepare the complete experience.
Check:
- Sound balance.
- Camera angle.
- Lighting.
- Background noise.
- Beginning and ending silence.
- Whether the performance feels complete.
Online performance is still performance. The listener receives the whole presentation, not just the notes.
Keeping Some Recordings Private For Honest Review
Private recordings are where you can be completely honest. You can record messy practice, failed attempts, slow work, and half-fixed passages without worrying about presentation.
Keep a private folder for:
- First attempts.
- Difficult sections.
- Teacher questions.
- Full-take tests.
- Monthly progress clips.
These recordings may never be shared, but they can become your most valuable learning record.
Common Mistakes Pianists Make When Recording Themselves
Recording is simple, but using recordings well takes discipline. Most problems come from expecting recordings to judge you instead of guide you.
Avoid these habits and your recordings will become much more useful.
Waiting Until The Piece Is Perfect
If you wait until a piece is perfect, you miss the main benefit of recording. Recording is most useful while the piece is still forming.
Record before you feel ready. That is when the feedback matters most.
Taking Repeated Takes Without Changing Anything
A folder full of recordings does not improve your playing by itself. Review and adjustment are the active ingredients.
After every recording, write one sentence:
- “Main issue: rushing before the cadence.”
- “Main fix: practice left hand slowly with metronome.”
- “Improved: melody is clearer than last week.”
If the next take is not testing a specific change, stop. You have moved from deliberate practice into repetition.
Listening Only For Wrong Notes
Wrong notes are easy to notice, but they are not the whole performance.
Also listen for:
- Pulse.
- Tone.
- Balance.
- Pedal.
- Phrasing.
- Character.
- Recovery.
A note-perfect recording can still sound flat. A musically convincing performance can survive a small slip.
Ignoring Rhythm And Pedal
Rhythm and pedal shape how listeners experience the piece. If rhythm is unstable or pedal is blurry, correct notes will not fully rescue the performance.
Make rhythm and pedal regular review targets. They often create the biggest audible improvement.
Deleting Every Imperfect Take
Do not delete every imperfect recording. Keep some of them as evidence.
You need old takes to hear progress. You also need imperfect takes to study recurring patterns.
A good archive is not a museum of perfection. It is a practice history.
Upgrading Gear Before Building The Habit
Better microphones will not fix unclear phrasing, uneven rhythm, or heavy accompaniment. Start with the recording habit first.
Once the habit is strong, better gear can improve shared recordings. But for self-review, consistency matters more than equipment.
Quick Recording Checklist For Pianists
A checklist keeps recording simple. Use it before, during, and after each take.
Before You Press Record
- Choose one section or one full-take goal.
- Decide whether audio or video is better.
- Place the phone or recorder securely.
- Check for distortion or background noise.
- Name the target before you play.
During The Take
- Keep going after mistakes.
- Stay close to your intended tempo.
- Listen for the main musical line.
- Avoid judging while playing.
- Finish the section or piece cleanly.
After Playback
- Listen once for the overall impression.
- Listen again for one target.
- Write one strength.
- Write one problem.
- Choose one practice fix.
- Re-record after practicing.
What To Write In Your Practice Notes
Use this simple format:
| Practice Note | Example |
| Piece/section | Chopin Prelude, measures 9–16 |
| Target | Left-hand steadiness |
| What I heard | Rushing into measure 13 |
| Fix | Slow left hand with metronome |
| Re-record result | More stable, melody still needs shape |
Here is another compact version you can use after any playback:
| Question | Your Note |
| Where did the issue happen? | Bar 18 |
| What kind of issue was it? | Accompaniment too heavy |
| What probably caused it? | Left hand sinking too much into lower notes |
| What fix will I test next? | Practice left hand alone lighter, then re-balance with melody |
The shorter and clearer this process becomes, the more likely you are to keep using it.
Simple Recording Review Rubric
Use this rubric when you want a more structured review. Rate each area from 1 to 5, then choose only one low-scoring area to practice first. Do not try to fix every category in one session.
| Review Area | What A Low Score Usually Means |
| Pulse stability | The tempo rushes, drags, or changes under pressure. |
| Note security | Wrong notes or uncertain fingering interrupt the flow. |
| Melody clarity | The main tune is hidden by accompaniment or inner voices. |
| Left-hand balance | Bass or accompaniment is too heavy. |
| Pedal clarity | Harmonies blur or pedal changes are late. |
| Phrase direction | The music sounds correct but flat. |
| Recovery | Mistakes cause stopping, repeating, or visible tension. |
| Physical ease | Shoulders, wrists, arms, or hands look tense on video. |
Best next step: choose the lowest score that most affects the listener. A small improvement in pulse, balance, or pedal often makes the whole performance sound better immediately.
Frequently Asked Questions
Why Should Pianists Record Their Performances?
Pianists should record their performances because playback reveals timing, tone, balance, phrasing, pedal, and confidence issues they often miss while playing. It also helps turn vague impressions into specific practice goals.
Is Recording Piano Practice Useful For Beginners?
Yes. Beginners benefit because recordings make small progress visible and help identify habits before they become permanent. Short, simple recordings are usually better than full-piece reviews at this stage.
Should I Record Audio Or Video?
Use audio when you want to study sound: rhythm, tone, balance, dynamics, and phrasing. Use video when you need to check posture, hand movement, pedal use, tension, or performance presence.
How Often Should I Record Myself?
Record short sections several times a week if you are actively improving a piece. Record full performances when preparing for recitals, exams, auditions, lessons, or online sharing.
Can Recording Help Performance Anxiety?
Recording can help by making mild pressure more familiar, especially when you practice full takes without stopping. It is not a medical treatment for severe anxiety, but it can support performance preparation.
What Should I Listen For First?
Start with the biggest musical issue: pulse, melody clarity, or continuity. After that, listen for tone, balance, dynamics, articulation, pedal, and recovery after mistakes.
How Many Takes Is Too Many In One Session?
If the next take is not testing a specific change, stop. That usually means you have moved from deliberate adjustment into emotional repetition, which is much less productive.
Should I Keep Bad Piano Recordings?
Keep some imperfect recordings because they show patterns and progress. You do not need to save every take, but a few rough recordings can help you hear what improved and what still needs work.
Is MIDI Useful For Piano Practice Review?
MIDI can be useful for checking notes, timing, velocity, and repeated accuracy patterns. It does not replace listening, because a performance can look accurate in MIDI and still sound stiff, unbalanced, or unmusical.
Final Thoughts
Recording your piano performances gives you something practice alone cannot always provide: a clearer view of what the listener hears. It shows the difference between what you intended, what you felt, and what actually came through.
Start small. Record one phrase, listen for one thing, fix one issue, and record again. Over time, those small loops build better rhythm, cleaner pedal, stronger phrasing, more confident full takes, and a more honest sense of progress.
The best reason pianists should record their performances is not to collect perfect takes. It is to make improvement visible, audible, and specific enough to act on.
Also Read: The Effects Of Piano Lessons On The Brain